Rebuilding my personal website: Getting Started

by Simon MacDonald
@macdonst
on
I recently decided to rebuild my out of date website. You can follow along with the first steps in the above video or read the transcript below.
[00:00:00] I’m Simon MacDonald the head of developer experience at Begin. And this is my super out of date website.
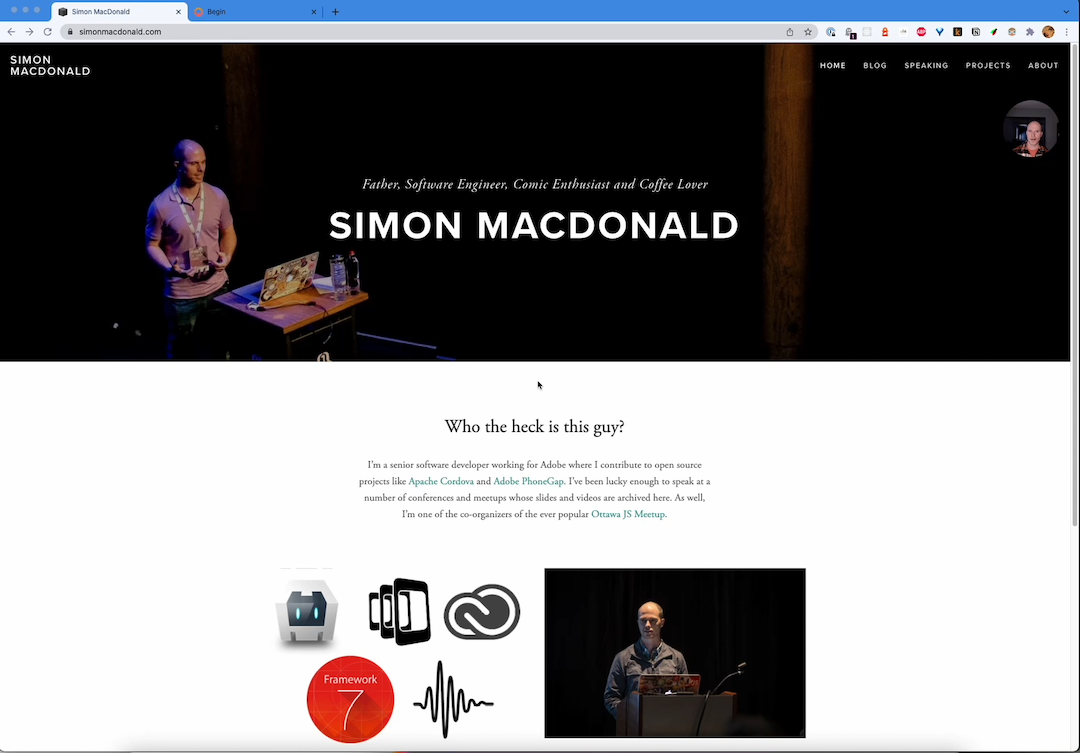
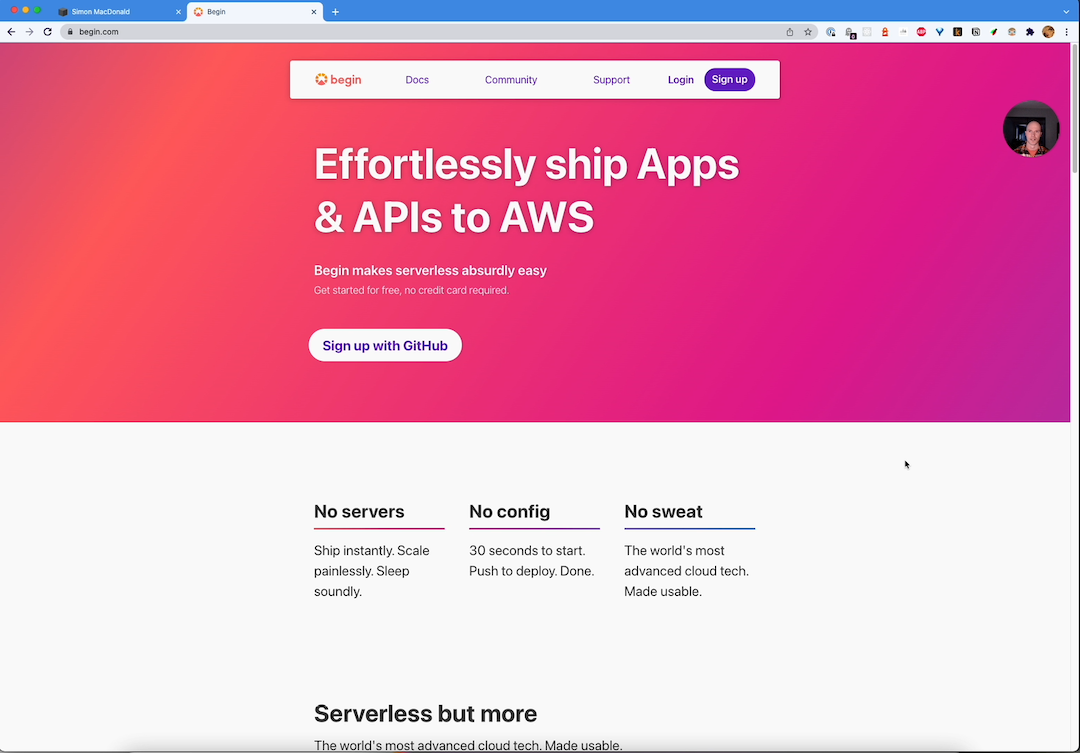
Yeah, a lot of these projects, I don’t get a chance to contribute to anymore. And nowhere in here does it actually say who I work for now. So I figured this would be a good opportunity for me to update this website by using Begin. So let’s follow along. How am I going to do that? Well, I guess the first thing to do is to go over, to Begin and login.
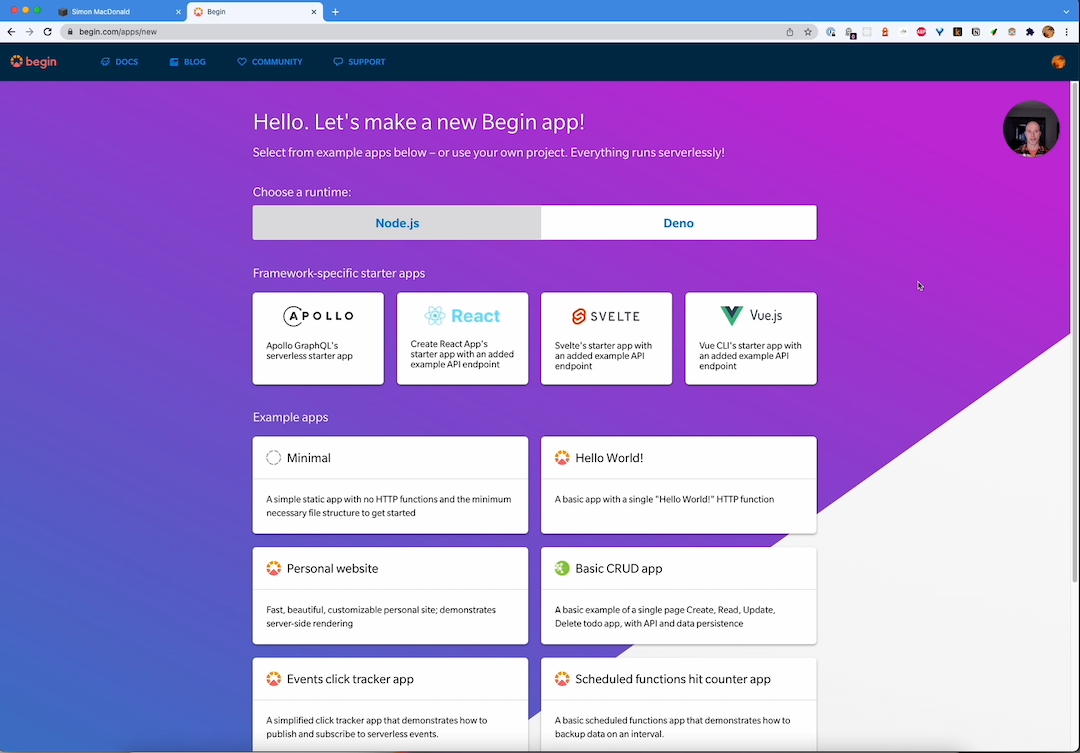
Now I’ve already authorized Begin to use my GitHub credentials to log me in. So. We’ll go ahead and do that. And now I have a bunch of apps, but we’re going to create a brand new one for this case. So let’s just click on, create new app. What kind of runtime do we want? Well, I prefer node JS over Deno right now. And for framework specific, I don’t really want a framework for this because it’s really just a personal website. So this Personal Website one sounds like a good starter application. So let’s choose that.
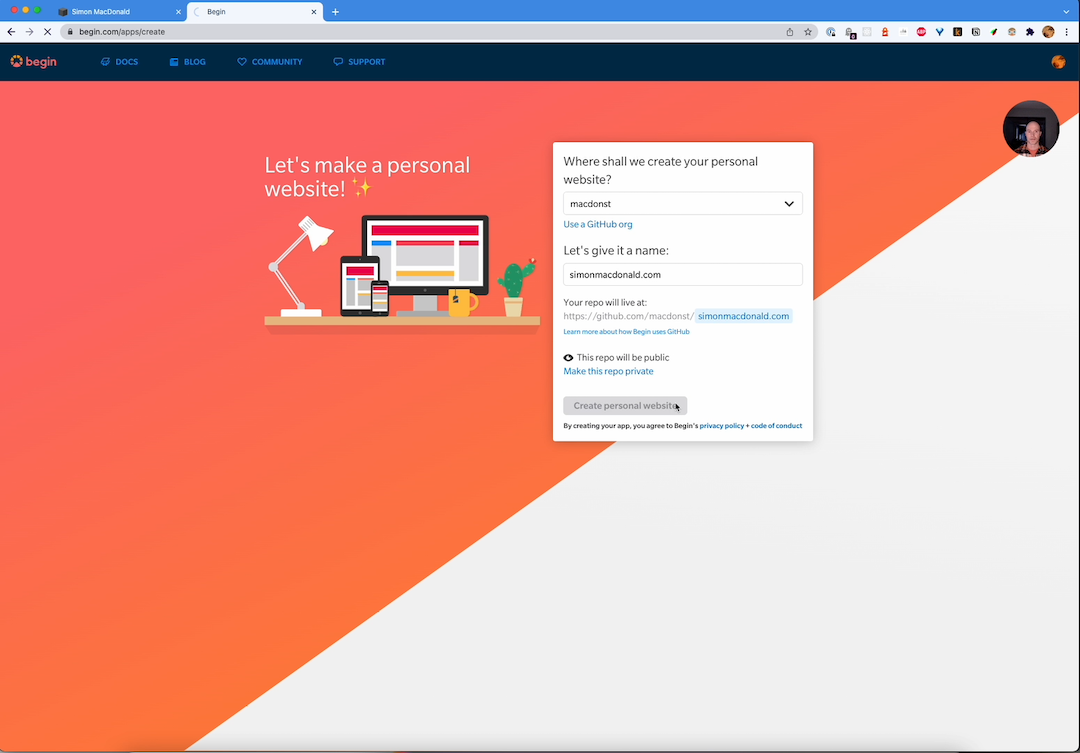
[00:00:53] And when we get over to this next page, it’s going to ask me what organization or user to put the website under. And I’m going to use macdonst , which is my GitHub user ID. And let’s give it a name. Let’s call it SimonMacDonald.com and you have just witnessed a Christmas miracle. As I have typed my own name without making a misspelling. That’s pretty impressive. I’m going to give myself a plus one on that. All right. So next step we’ll just go ahead and create this personal website.
And what this is going to do is it’s going to fork. That personal website template into my GitHub organization and set up all of the things on AWS. That we need in order to be able to build our website. All right. So while the setup is happening, let’s just check out the git repo.
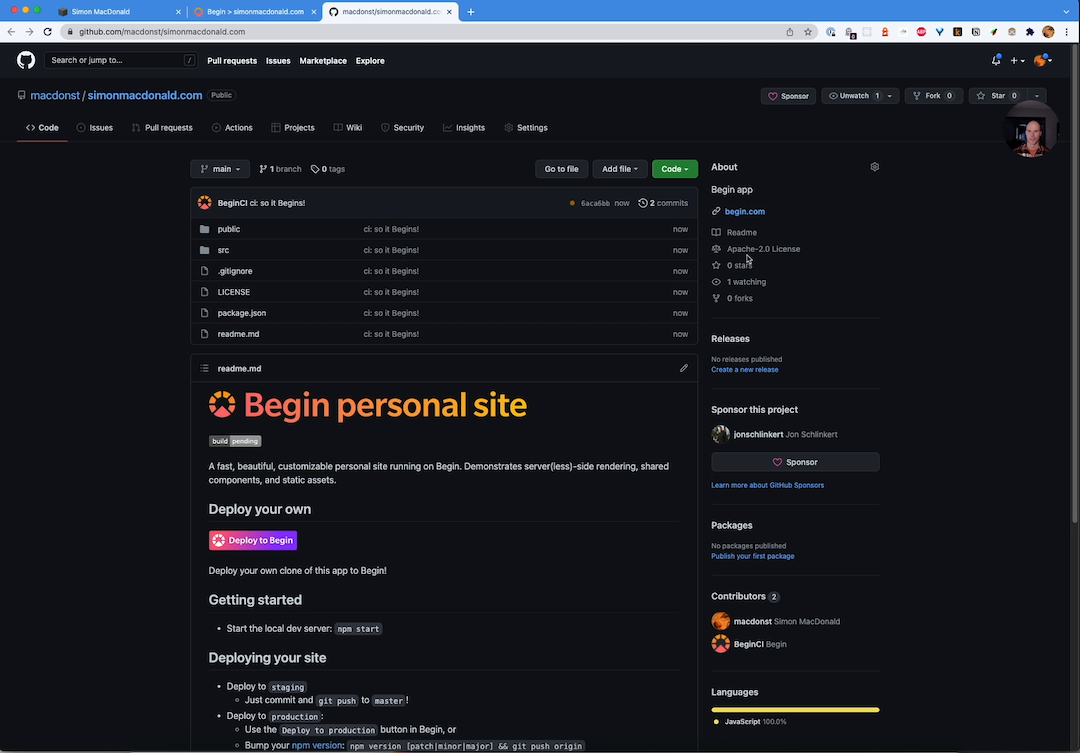
[00:01:34] Great. So everything over here is all set up. You can see, we have some files that we need in order to build things. It’s based off of the personal website. And the stuff is going fairly well. Well while all of the CI/CD. Is happening in the background. Let’s go ahead and set up things so that we can do local development. So I’m going to switch over to vs code here. And I’m going to start by doing a git clone of the repository.
[00:02:02] And once I do that I change into that directory. And do an NPM install. So. While the NPM install is happening locally.
git clone git@github.com:macdonst/simonmacdonald.com.git
cd simonmacdonald.com
npm install
Let’s go ahead and go back to the web interface and check out what’s been going on there. Well over in the web interface, the CI/CD has finished. You can see that we’ve done the verification and the install of node modules. We’ve skipped a bunch of steps here that are optional. And finally, we’ve done a deploy. So what’s happened is that the website has been deployed to our staging environment, but we also have production set up as well.
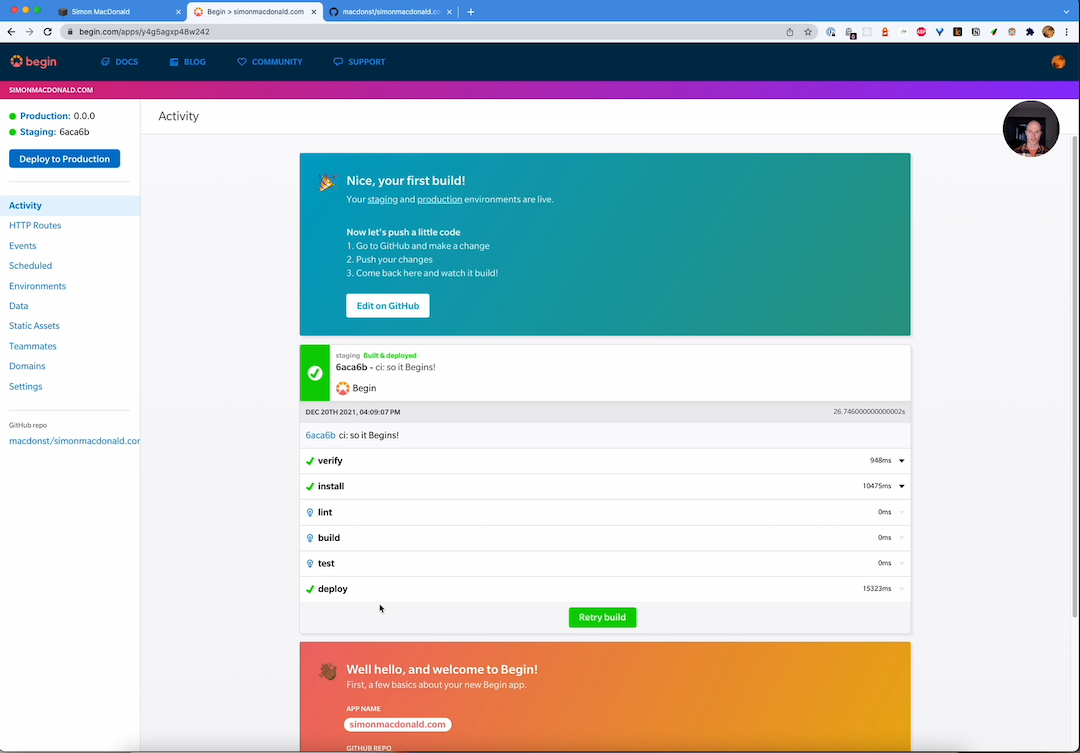
But let’s go ahead and take a look at what a website looks like on staging currently.
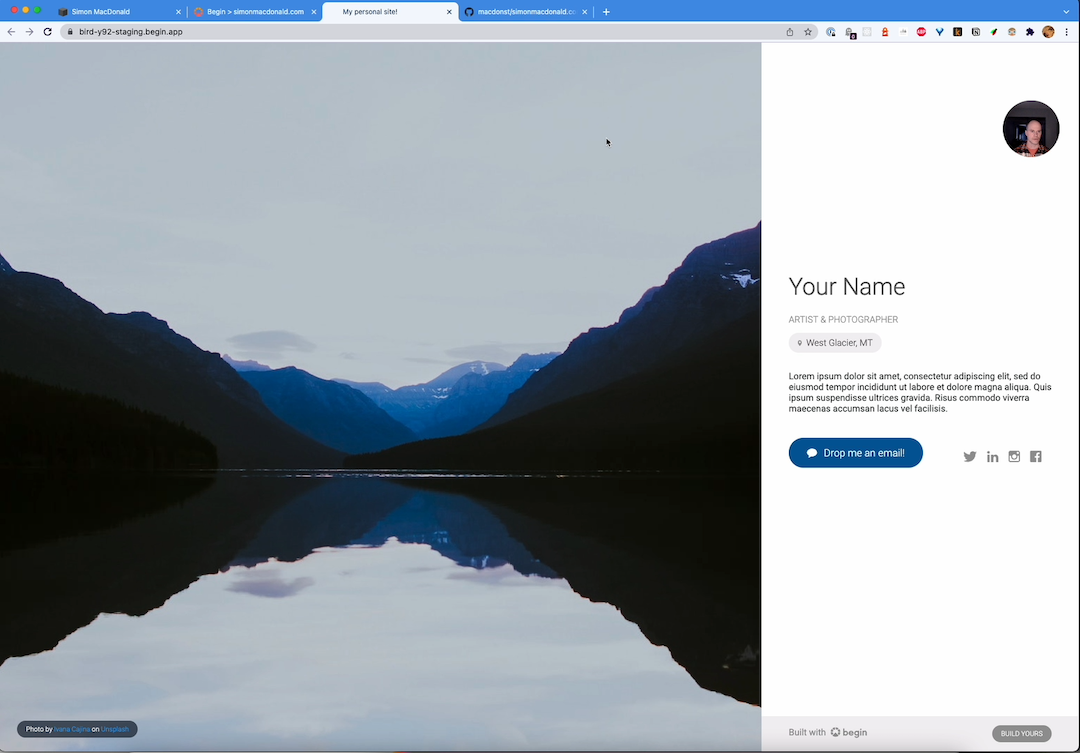
[00:02:43] And so right now we have a very generic site. We don’t have my name or anything else that is associated with me set up on it, but you can see how easy it was to get this very simple site set up. Now let’s go back to my local installation. And see how things are happening. Oh, great. So everything is already installed. So we’re going to have to open that folder. So bear with me for a second. Yeah, I was. Going to my developer. It’s macdonst and my website.
[00:03:16] All right. So now everything is up and running. When I get the, got a terminal back here. And so we’re able to run. Local commands and let’s actually start the local development process. So if we just run NPM start. It’s going to start at the sandbox and, oh, well, we’ve run into a problem with Mac OS Monterey.
npm start
⚠️ Warning:
  You are running a macOS Monterey or later.
  These versions of macOS are known to run processes on port 5000.

  Sandbox may be unable to start due to port 5000 already being in use.
  Please set the ARC_TABLES_PORT environment variable to an unused port number.
So we were using port 5,000 for one of our database ports and now, and that’s a reserved port on Mac OS so what we need to do in order to fix that is just export this environment variable to tell us what port to run our database on. All right. So let’s go back to NPM start.
export ARC_TABLES_PORT=7001
npm start
And you can see now at http://localhost:3333 and we have her local website up and running. So if we take a look at that.

[00:04:01] Ah, all right. So basically we have exactly the same thing running on our local server as we do have in our staging site. That’s great. I’ll be able to do a lot of my development locally and then push it to staging in order to make sure that everything’s all set up. So, how do we want to tackle things? Well, probably I should put my correct name in here. And so let’s delve into the source code a bit. So under the source directory, there’s two folders. One is HTTP, which is for all of the routes and views that is a shared folder that we use in order to put view code that is used in multiple routes.
.
├── public/
└── src/
    ├── http/
    │   └── get-index/
    └── views/
And in this situation, we only have the one route which is get index. And so if I take a look at index.js, it’s very simple. We are passing in a bunch of basic bio information into our main template, which is contained in views in order to have the website get generated. So I’m going to start by typing in my name now let’s see if I can actually type it in, oh, look at that twice in a row. I’ve typed in my website correctly. That is pretty wild. All right. Let’s just make it simonmacdonald.com. Get rid of that exclamation point. And what’s my occupation. Well, Now it’s head of developer experience at Begin. And location. I’m an Ottawa Ontario. Yes. I’m Canadian. I can prove it to all of the folks that aren’t in the United States I can just say about. And I think that pretty much proves it. People in Canada, they’re like, I didn’t notice a difference. And everybody in the states is probably laughing right now. And for the bio. I’m just going to make it short and make it. Coffee. Lover. And human good reads. As I, do we love to read. For email, just going to leave it as your email@email.com right now. I’ll put in my Twitter account, which is the same as my Instagram account. And my LinkedIn. is Simon MacDonald. And for Facebook. Oh, I don’t use it. So I’m just going to get rid of it completely. All right. So I’ve made some changes. To the bio here and let’s go back over. To the website and we are running locally. And if I refresh this page, Yeah, you can see that things have changed.
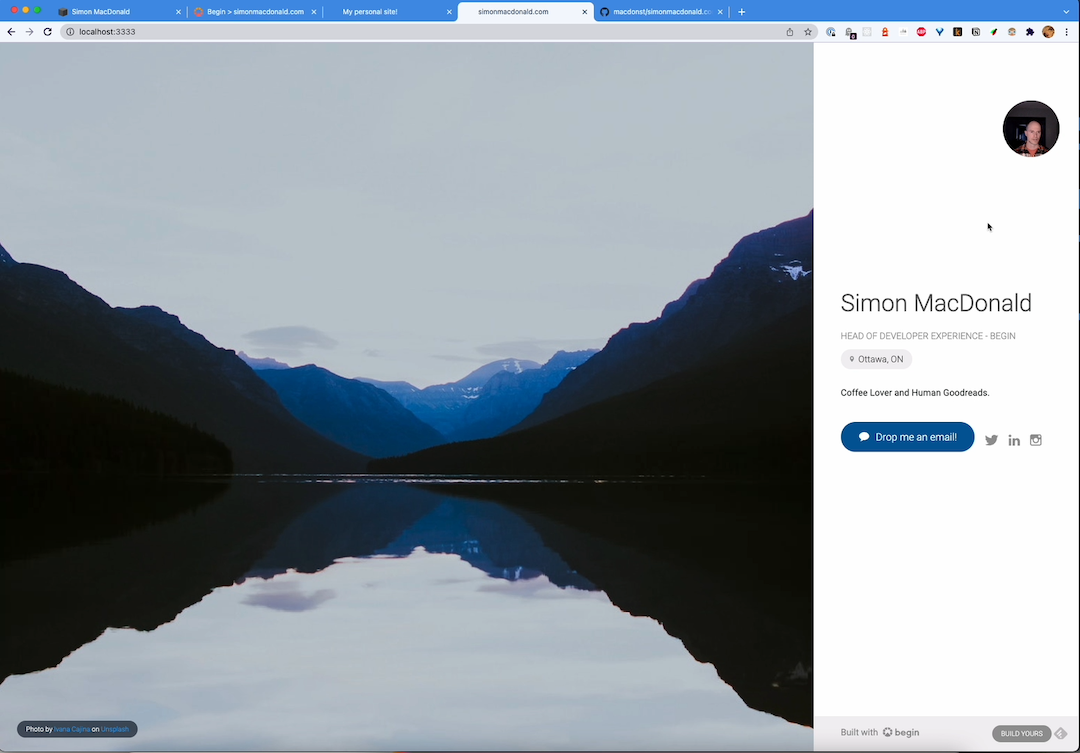
We have my name, I location. Other stuff is all set up. And in fact, if we go to Twitter, we’ll go to my Twitter. Page so awesome. Local development is working just fine. But I had You know, I kinda actually like this. Photo that we have here. So I’m going to replace the photo that is currently deployed with the website, with a one that is like a bit more personal. So what am I going to do? Let’s see, hang. I’m going to need to start. A new terminal here, and I’m just going to add a CD into the public directory.
[00:06:44] And if I can.
[00:06:46] There we go. Yeah. I can actually type a, I’m going to copy. From, I think I’ve got it in downloads. This. Ah, Yes, you can access stuff. From my downloads folder. Yes, hero.jpg, and I’m going to drop it in here. So if we take a look in public you can see that there is now a hero.jpg. Basically anything that you put into the public folder, once we deploy it to staging or to production, they will get deployed to an S3 bucket for you. Now, what do I want to do? So down here for photographer? Well, you know, actually this is not the person who took the photo. My friend Michael Brooks. Took the photo. And if I remember correctly, his website is michaelbrooks.ca. And for the image. I’m going to make it hero.jpg. And so. You may notice something here as this little convenience methods called arc.static. So when you deploy any of your assets to the S3 bucket, they get fingerprinted. So that way each asset has a different version so that when you upgrade your site, you don’t serve people a stale version of your asset. So arc.static, all that asked you to refer to the file name that is currently on your desktop and not have to worry about all of that fingerprinted stuff. So that’s all saved. Let’s go back over to the website and refresh things.
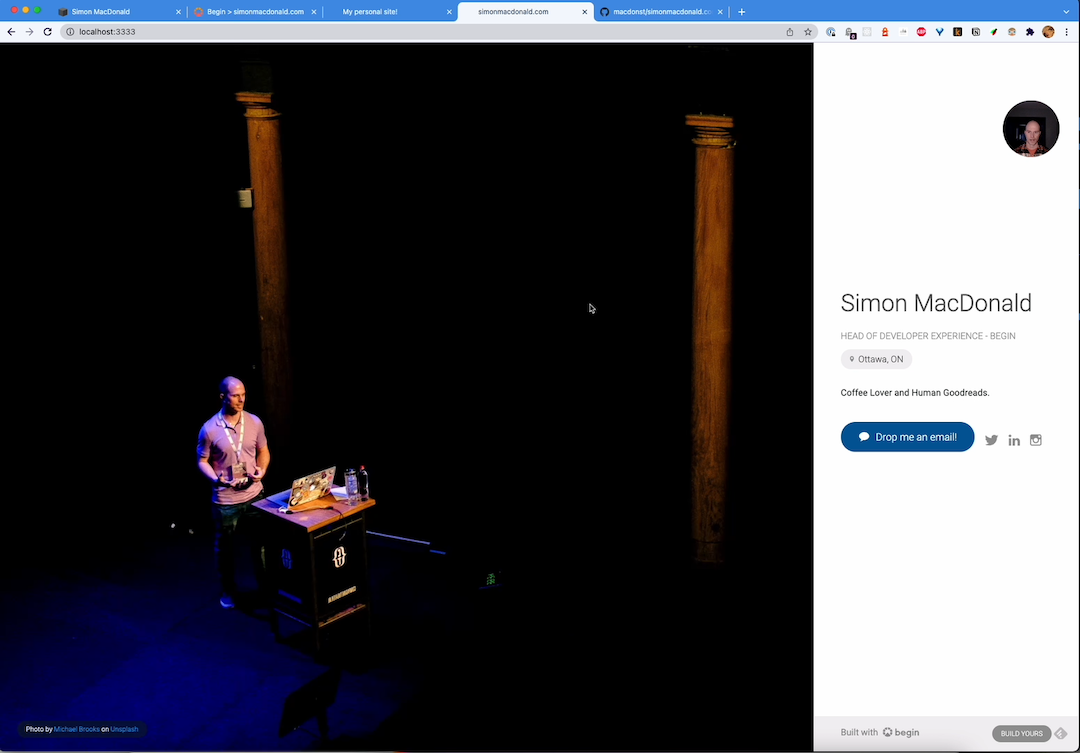
And yes, lo and behold, we’ve got my image. We’ve. We’ve got an updated. It’s Michael Brooks on Unsplash. Now technically that’s, that’s not on, Unsplash. So let’s delve into that a bit. Where is that code? So. Main is generating the view. So if we take a look at main. We can see that there is this component called splash, which is the hero image. And from there, there’s a photo credit component. So if we dive into photo credit you can see that photo is by. And then on this service, It’s like, I really want that service in there and someone’s. Going to strip that out. Go back over and do a quick refresh. And yes, the photo is now just by Michael Brooks. Well, that’s pretty good for right now.
I think I’m just going to do a commit.
[00:08:53] So let’s commit everything.
[00:08:56] And yeah, I forgot to do I git add. Because I am a dummy.
[00:09:01] The ever so useful first commit message. And let’s just go ahead and just push that up to origin main and see what happens. So. Going back over to our web interface on Begin you’ll be able to see that the commit was picked up by Begin and it’s building us a new version of the website. So really didn’t have to do anything there. The CI CD processes taken over for us. And like most things in life, the installation of node modules is what takes the longest. All right. So. We’re about to get into the deploy side of things we’ll see how that goes.
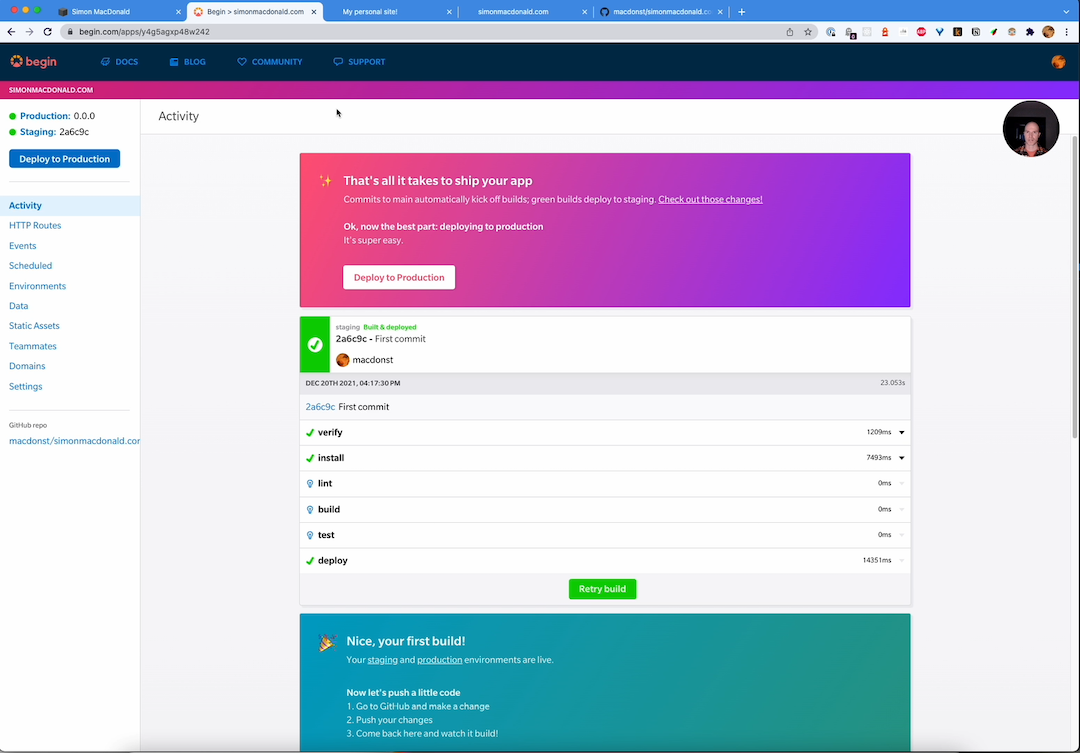
[00:09:35] All right. We have deployed the new version of the site, it’s up on staging now. So if I take a look. At our staging site. And if I do a refresh of it, Lo and behold my updates are all set up. So that’s just a very quick way of getting the website up and running. You might’ve noticed, I skipped over the piece here where it was asking me for my email address. And we’re going to address that in a future video where I’m going to actually show you how to accept. You know, comments from the web and have it relayed to your personal inbox. So we’re going to save that for next time. Anyway. Let me know if you thought this was useful, have a great day.
Next Steps
- Deploy a new Personal Website to Begin in 30 seconds (no credit card required):