Using Auth0 to secure Architect application routes

by Simon MacDonald
@macdonst
on
 Photo by
 Overview
In this blog post, we are going to explore using Architect, Auth0, and DynamoDB to build a ToDo app. Each user will only be able to see their own todos, so we will need to implement authentication, authorization, and a database.
This article will cover:
- configuring Auth0, Architect, and DynamoDB to work together
- using the Auth0 Authentication API for auth
- creating AWS Lambda functions to handle everything else
The full source code of the ToDo app code can be found here.
Prerequisites
This article does not assume prior experience with any of these technologies. However, you will need Node.js installed to follow along. In addition, plan to have accounts for the managed services in the section below (Auth0 and Begin). Both are free as of this writing and don’t require a credit card.
Tech Stack
Architect is a simple tool to build and deliver powerful cloud function-based web apps and APIs.
Auth0 is an authentication and authorization solution that makes managing users and securing applications a breeze. It is an extremely battle-tested and mature solution for auth.
DynamoDB is a NoSQL database that is designed to be highly available and performant.
Auth0
The first thing we need to do is sign up for a free account with Auth0. Once at the dashboard, we need to create a new Tenant for our project.
A tenant is a way of isolating our users and settings from other applications we have with Auth0.
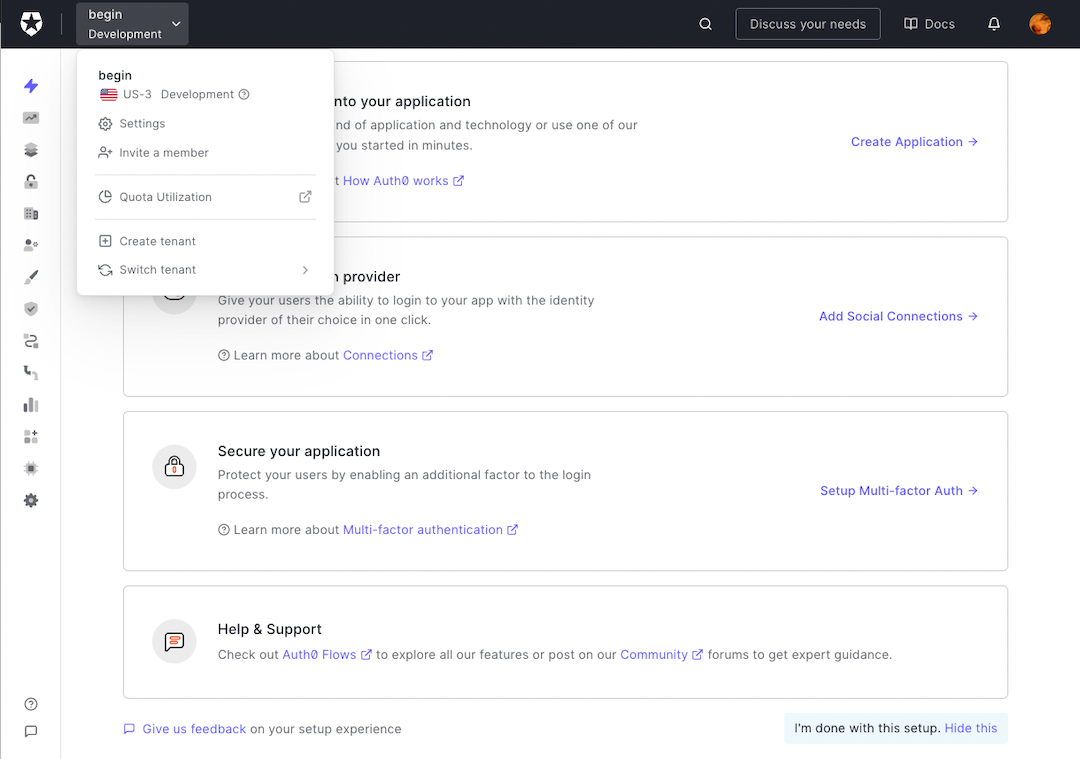
Click the name of your account in the top left, and then select Create tenant from the drop down.
Give your tenant a unique Domain, set the Region closest to you, and leave the Environment Tag set to Development.
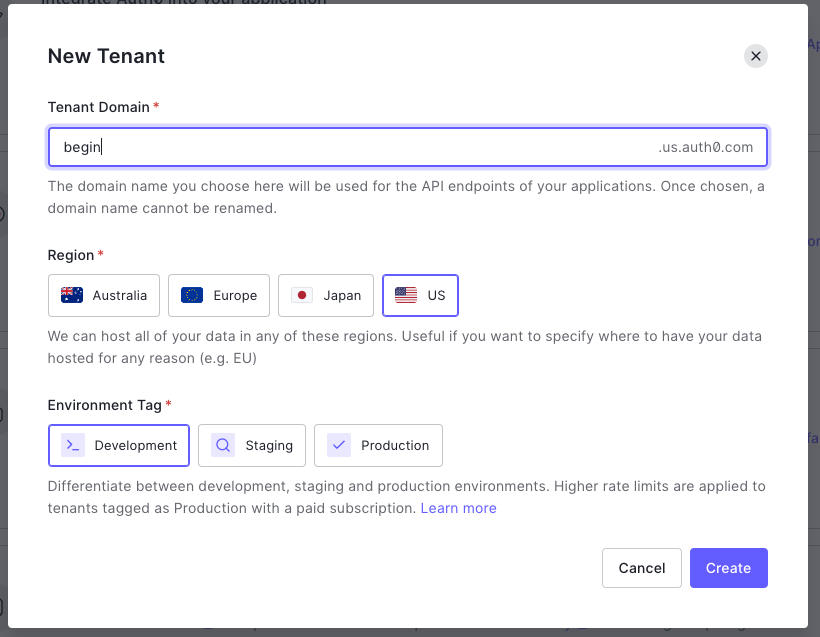
In a production application, you want your region to be as close as possible to the majority of your users.
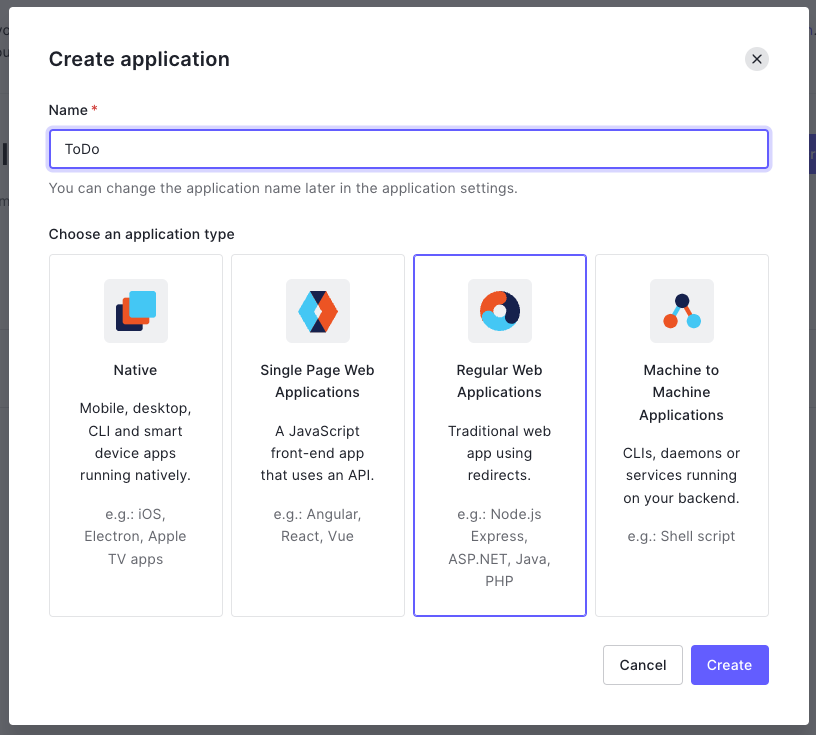
Next, we want to create an Application. Select Applications > Applications from the sidebar menu, and click + Create Application. Give it a name and select Regular Web Applications. Click Create.
From the application’s page, you are redirected to select the Settings tab and scroll down to the Application URIs section.
Add the following:
- Allowed Callback URLs:
http://localhost:3333/callback - Allowed Logout URLs:
http://localhost:3333
If you are running the app on a different port, you can change the port number in the URL.
Go to Advanced Settings > OAuth and confirm the JSON Web Token (JWT) Signature Algorithm is set to RS256 and that OIDC Conformant is enabled. Then save your changes.
We are now done with configuring Auth0. On to building our app!
Architect
The fastest way to create a Architect application is to run the following npm command:
npm init @architect todo-auth0To make this simple, we’ll add some HTML right to our function’s response, but it’s possible to send static HTML with Architect. Replace the contents of src/http/get-index/index.js with:
// src/http/get-index/index.js
exports.handler = async function http (req) {
  return {
    statusCode: 200,
    headers: {
      'cache-control': 'no-cache, no-store, must-revalidate, max-age=0, s-maxage=0',
      'content-type': 'text/html; charset=utf8'
    },
    body: `
<!DOCTYPE html>
<html lang="en">
<head>
  <meta charset="UTF-8">
  <meta name="viewport" content="width=device-width, initial-scale=1">
  <title>Architect</title>
  <style>
     * { margin: 0; padding: 0; box-sizing: border-box; } body { font-family: -apple-system, BlinkMacSystemFont, sans-serif; } .max-width-320 { max-width: 20rem; } .margin-left-8 { margin-left: 0.5rem; } .margin-bottom-16 { margin-bottom: 1rem; } .margin-bottom-8 { margin-bottom: 0.5rem; } .padding-32 { padding: 2rem; } .color-grey { color: #333; } .color-black-link:hover { color: black; }
  </style>
</head>
<body class="padding-32">
  <h1 class="margin-bottom-16">
    Architect ToDo Auth0
  </h1>
</body>
</html>
`
  }
}
Run the project in Development mode:
cd todo-auth0
npm start
And confirm it is working at http://localhost:3333.
Authentication
Let’s add a couple of routes to our application to handle authentication. The app.arc manifest is a simple config format that controls what resources are created for local development and deployed in the cloud. Open the app.arc file and add two new lines to the bottom for our callback and logout routes.
@app
todo-auth0

@http
get /
get /callback
get /logout
Then quit the development server and run the following command to generate the callback and logout routes:
arc initYou will notice this create a two new folders in the src/http directory, get-callback and get-logout which will be used to handle the /callback and logout routes.
Create a .env file in your root project folder and add:
AUTH0_BASE_URL=http://localhost:3333
AUTH0_ISSUER_BASE_URL=https://<name-of-your-tenant>.<region-you-selected>.auth0.com
AUTH0_CLIENT_ID=get-from-auth0-dashboard
AUTH0_CLIENT_SECRET=get-from-auth0-dashboard
AUTH0_CLIENT_ID and AUTH0_CLIENT_SECRET can be found at Applications > Settings > Basic Information in the Auth0 Dashboard.
You will need to quit the development server and re-run the npm start command anytime new environment variables are added to the .env file
Let’s update our src/http/get-index/index.js file to add the ability to log in and out:
// src/http/get-index/index.js
const arc = require('@architect/functions')

exports.handler = arc.http.async(http)

async function http (req) {
  const {
    AUTH0_BASE_URL: baseUrl,
    AUTH0_ISSUER_BASE_URL: issuerBaseUrl,
    AUTH0_CLIENT_ID: clientId
  } = process.env

  const loginUrl=`${issuerBaseUrl}/authorize?response_type=code&client_id=${clientId}&redirect_uri=${baseUrl}/callback&scope=openid%20profile`

  let session = await arc.http.session.read(req)

  return {
    statusCode: 200,
    headers: {
      'cache-control': 'no-cache, no-store, must-revalidate, max-age=0, s-maxage=0',
      'content-type': 'text/html; charset=utf8'
    },
    body: `
<!DOCTYPE html>
<html lang="en">
<head>
  <meta charset="UTF-8">
  <meta name="viewport" content="width=device-width, initial-scale=1">
  <style>
     * { margin: 0; padding: 0; box-sizing: border-box; } body { font-family: -apple-system, BlinkMacSystemFont, sans-serif; } .max-width-320 { max-width: 20rem; } .margin-left-8 { margin-left: 0.5rem; } .margin-bottom-16 { margin-bottom: 1rem; } .margin-bottom-8 { margin-bottom: 0.5rem; } .padding-32 { padding: 2rem; } .color-grey { color: #333; } .color-black-link:hover { color: black; }
  </style>
</head>
<body class="padding-32">
  <h1 class="margin-bottom-16">
    Architect ToDo Auth0
  </h1>
  <div class="margin-bottom-16">
  ${session.name ? `Welcome ${session.name}!` : ''} ${!session.token ?  `<a href="${loginUrl}">Login</a>` : `<a href="/logout">Logout</a>`}
  </div>
</body>
</html>
`
  }
}
Clicking the login link will redirect you to the Auth0 login page where you will be asked to grant access to your application. Once you grant access, Auth0 will re-direct you to the applications /callback route where the authorization code will be included as a URL query parameter.
Once we have the authorization code we will need to exchange it for an access token and store the access token in the session. We’ll do this by making a request to the Auth0 /oauth/token endpoint with the authorization code and the client ID and client secret. We’ll await the response to this API call and decode the response body to get which will look like this:
{
  access_token: 'ey…',
  id_token: 'ey…',
  scope: 'openid profile',
  expires_in: 86400,
  token_type: 'Bearer'
}
We are going to decode the id_token to get the user’s name and nickname which we will user later on in the application. The id_token is a JSON Web Token (JWT) that contains information about the user. You can read more about JWT’s, and even decode them here.
Consequently, we now need to update the src/http/get-callback/index.js file to handle the /callback route:
// src/http/get-callback/index.js
const arc = require('@architect/functions')
const fetch = require('node-fetch')
const jwt_decode = require('jwt-decode')

exports.handler = arc.http.async(http)

async function http (req) {
  const {
    AUTH0_BASE_URL: baseUrl,
    AUTH0_ISSUER_BASE_URL: issuerBaseUrl,
    AUTH0_CLIENT_ID: clientId,
    AUTH0_CLIENT_SECRET: clientSecret
  } = process.env

  const params = new URLSearchParams()
  params.append('grant_type', 'authorization_code')
  params.append('code', req.query.code)
  params.append('client_id', clientId)
  params.append('client_secret', clientSecret)
  params.append('redirect_uri', `${baseUrl}/callback`)

  const response = await fetch(`${issuerBaseUrl}/oauth/token`, {
    method: 'post',
    body: params,
    headers: {'Content-Type': 'application/x-www-form-urlencoded'}
  });
  const data = await response.json();
  const decoded = jwt_decode(data.id_token)

  return {
    session: {token: data, name: decoded.name, accountID: decoded.nickname},
    location: '/'
  }
}
After successfully exchanging the authorization code for an access token, we will redirect the user to the home page. We will also store the user’s name in the session as we will use this value to display the user’s name in the home page and use the account ID as a key when interacting with our DB.
When the user clicks the logout link, we will need to remove the access token from the session. To do this, we will need to update the src/http/get-logout/index.js file:
// src/http/get-logout/index.js
const arc = require('@architect/functions')
const fetch = require('node-fetch')

exports.handler = arc.http.async(http)

async function http (req) {
  const {
    AUTH0_BASE_URL: baseUrl,
    AUTH0_ISSUER_BASE_URL: issuerBaseUrl,
    AUTH0_CLIENT_ID: clientId
  } = process.env

  const logoutUrl=`${issuerBaseUrl}/v2/logout?client_id=${clientId}&returnTo=${baseUrl}`
  await fetch(logoutUrl);

  return {
    session: {},
    location: '/'
  }
}
Great, now we have a way to authorize and authenticate users but we need a way to store the user’s todo list but before we forget, let’s install the two new dependencies we introduced node-fetch and jwt-decode:
npm i node-fetch jwt-decodeYou will need to quit the development server and re-run the npm start command anytime new npm packages are added to the project.
DynamoDB
DynamoDB is an incredibly powerful fully managed NoSQL database which we will use to store our todo list. Instead of jumping over to the AWS console and creating a new table, we will modify the app.arc file and run arc init to create a new table for us.
@app
todo-auth0

@http
get /
get /callback
get /logout

@tables
data
  scopeID *String
  dataID **String
  ttl TTL
You have now provisioned access to DynamoDB and you can start using it to store your todo list. No clicking around in various web consoles in order to setup your database.

In order to make dealing with DynamoDB easier, we will add the @begin/data package to our project:
npm i @begin/dataWhen it comes to our data schema for our todo’s we’ll want it to look like this:
data:
    key:
        type: string
    todos:
        type: array
        todo:
            type: object
            properties:
                id:
                    type: string
                content:
                    type: string
                completed:
                    type: boolean
                createdAt:
                    type: integer
                updatedAt:
                    type: integer
Since DynamoDB is a key-value NoSQL database we will use the key to store the account ID and the todos to store the todo items. There’s no need to configure the schema anywhere as the document will be automatically created for us.
Now we can start using the @begin/data package to interact with our DynamoDB table. The src/shared folder is a special folder, Architect copies the contents of src/shared into all Lambdas at deploy time. Create a new file in the src/shared directory called crud.js.
// src/shared/crud.js
const { customAlphabet } = require('nanoid')
const nanoid = customAlphabet('1234567890BCDFGHJKLMNPQRSTVWXZ', 8) // no vowels
const data = require('@begin/data')

module.exports = { read, upsert }

async function read(accountID) {
    let todos = []
    if (accountID) {
        const response = await data.get({
            table: 'todos',
            key: accountID
        })
        todos = response ? response.items : []
        todos.sort((a, b) => a.created_at - b.created_at)
    }
    return todos
}

async function upsert(accountID, {
        id = nanoid(),
        content,
        completed = false,
        created_at = Date.now(),
        updated_at = Date.now()
    }) {

    if (accountID) {
        const todos = (await read(accountID)).filter(todo => todo.id !== id)
        await data.set({
            table: 'todos',
            key: accountID,
            items: [...todos, {
                content,
                completed: completed === "true" ? true : false,
                id,
                created_at,
                updated_at
            }]
        })
    }
}
For the read function we fetch the todo list from DynamoDB and sort it by the created_at property. If the user hasn’t created any todo’s yet, we’ll return an empty array.
The upsert function will create a new todo item and add it to the list if no id is provided. If an id is provided, we’ll update the existing todo item.
Now that we can read and write to our database it’s time to update our UI to display the todo list.
Shared Views
We are going to create a couple of components, called ToDos and ToDo, that will be used by our Lambda functions to display our todo list. We’ll create these files under src/views/components as the src/views folder is a special folder Architect copies the contents of src/views into all GET request Lambdas at deploy time.
The first component will be a list of todo items and we’ll call it src/views/components/todos.js.
// src/views/components/todos.js
const ToDo = require('./todo')
module.exports = async function ToDos ({items}) {
return `
<form action="/todos" method="post" class="margin-bottom-16">
<input type="text" name="content" placeholder="Add a todo" />
<input type="submit" value="Add" />
</form>
<ul class="margin-left-8 margin-bottom-16">
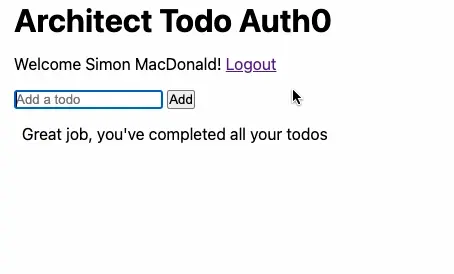
${items.length > 0 ? items.map(todo => ToDo(todo)).join('') : `Great job, you've completed all your todos`}
</ul>
`
}The ToDos component will render a form and a list of todo items. The form will allow the user to add a new todo item. The rendering of each todo item will be handled by the ToDo component.
// src/views/components/todo.js
module.exports = function ToDo ({content, completed, id, created_at}) {
    return `
    <li>
        ${completed ? `<del>${content}</del>` : content}
        <form action="/todos/${id}" method="post" style="display: inline;">
            <input type="hidden" name="content" value="${content}" />
            <input type="hidden" name="created_at" value="${created_at}" />
            <input type="hidden" name="completed" value="${!completed}" />
            <input type="submit" value="${completed ? 'Undo' : 'Complete'}" />
        </form>
    </li>
`
}
Once we have created these components we will need to update our src/views/index.js file to render the todos.
// src/http/get-index/index.js
const arc = require('@architect/functions')
const { read } = require('@architect/shared/crud')
const ToDos = require('@architect/views/components/todos')

exports.handler = arc.http.async(http)

async function http (req) {
  const {
    AUTH0_BASE_URL: baseUrl,
    AUTH0_ISSUER_BASE_URL: issuerBaseUrl,
    AUTH0_CLIENT_ID: clientId
  } = process.env

  const loginUrl=`${issuerBaseUrl}/authorize?response_type=code&client_id=${clientId}&redirect_uri=${baseUrl}/callback&scope=openid%20profile`

  let session = await arc.http.session.read(req)

  let items = await read(session.accountID)

  return {
    statusCode: 200,
    headers: {
      'cache-control': 'no-cache, no-store, must-revalidate, max-age=0, s-maxage=0',
      'content-type': 'text/html; charset=utf8'
    },
    body: `
<!DOCTYPE html>
<html lang="en">
<head>
  <meta charset="UTF-8">
  <meta name="viewport" content="width=device-width, initial-scale=1">
  <style>
     * { margin: 0; padding: 0; box-sizing: border-box; } body { font-family: -apple-system, BlinkMacSystemFont, sans-serif; } .max-width-320 { max-width: 20rem; } .margin-left-8 { margin-left: 0.5rem; } .margin-bottom-16 { margin-bottom: 1rem; } .margin-bottom-8 { margin-bottom: 0.5rem; } .padding-32 { padding: 2rem; } .color-grey { color: #333; } .color-black-link:hover { color: black; }
  </style>
</head>
<body class="padding-32">
  <h1 class="margin-bottom-16">
    Architect ToDo Auth0
  </h1>
  <div class="margin-bottom-16">
  ${session.name ? `Welcome ${session.name}!` : ''} ${!session.token ?  `<a href="${loginUrl}">Login</a>` : `<a href="/logout">Logout</a>`}
  </div>
  ${session.token ? await ToDos({items}) : ''}
</body>
</html>
`
  }
}
Great we can see the add todo form but trying to add a new todo item will fail. We’ll need to add new routes to handle the submission and completion of todo items.
Update Routes
Once again we open the app.arc file and add two new lines to the bottom of the @http section for the create post /todos and update post /todos/:id routes.
@app
todo-auth0

@http
get /
get /callback
get /logout
post /todos
post /todos/:id

@tables
data
  scopeID *String
  dataID **String
  ttl TTL
This will create src/http/post-todos/index.js and src/http/post-todos-000id/index.js files.
For src/http/post-todos/index.js replace the contents with the following to handle the submission of a new todo item:
// src/http/post-todos/index.js
const arc = require('@architect/functions')
const { upsert } = require('@architect/shared/crud')

exports.handler = arc.http.async(http)

async function http (req) {
  await upsert(req.session.accountID, req.body)

  return {
    location: `/`
  }
}
For src/http/post-todos-000id/index.js replace the contents with the following to handle the updating of an existing todo item:
// src/http/post-todos-000id/index.js
const arc = require('@architect/functions')
const { upsert } = require('@architect/shared/crud')

exports.handler = arc.http.async(http)

async function http (req) {
  await upsert(req.session.accountID, { ...req.body, id: req.params.id})

  return {
    location: `/`
  }
}
So we are now all setup to add new todo items and complete existing ones or are we?
Protecting Routes
Whoops! We forgot to protect our routes. We are going to create a new file called src/shared/auth.js to handle the authentication of our routes.
// src/shared/auth.js
const arc = require('@architect/functions')
const jwt_decode = require('jwt-decode')

module.exports = { auth }

async function auth(req) {
    const session = await arc.http.session.read(req)
    if (!session.token) {
        return {
            status: 401,
            json: { errors: [ 'authorization_token_missing' ] }
          }
    }

    try {
        const decoded = jwt_decode(session.token.id_token)
        if (decoded.aud !== process.env.AUTH0_CLIENT_ID) {
            return {
                status: 401,
                json: { errors: [ 'token_audience_invalid' ] }
            }
        }
    } catch (err) {
        return {
            status: 401,
            json: { errors: [ 'invalid_jwt' ] }
        }
    }
    return
}
The auth function will check to make sure there is an authorization token in the session and that it is valid. If there is no token or the token is invalid, the function will return a 401 response with the errors property set to an array containing the error message.
Then in both src/http/post-todos/index.js and src/http/post-todos-000id/index.js we will include the auth function and call it before handling the request.
const { auth } = require('@architect/shared/auth')
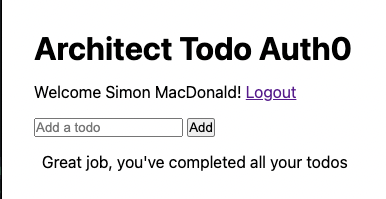
exports.handler = arc.http.async(auth, http)Congrats you now have a functional todo app! Go try it out.
Psst! Want me to blow your mind? Try disabling JavaScript on your browser (Chrome, Firefox, Safari) and see what happens. The site still works because there is no client side JavaScript. Next time we will show how to progressively enhance the app to add more features while maintaining a base level of functionality.
Next Steps
Want to try it out for yourself:
- Sign up for a free account on Begin.
- Click the button below to deploy a this ToDo app to your account.

- Don’t forget to set the environment variables for Auth0 in the Begin console.
- As well as, setting the Allowed Callback URLs and Allowed Logout URLs in the Auth0 console.