Mastodon Link Verification in the Enhance Blog Template

by Simon MacDonald
@macdonst
@macdonst@mastodon.online
on
Profile link verification on Mastodon differs greatly from the now-demonized blue checkmark on Twitter. Since document-based verification is only possible with a central authority, Mastodon provides a way to cross-reference links in your profile to prove you are the actual owner of those resources.
In this case, your deployed Enhance Blog can be trusted to verify your identity on Mastodon by adding a rel=me link.
rel=me
Using rel=me on a hyperlink indicates that its destination represents the same person or entity as the current page, which is a key building-block of web-sign-in and IndieAuth. indieauth.com uses rel=me links to enable signing into websites such as IndieWeb.org.
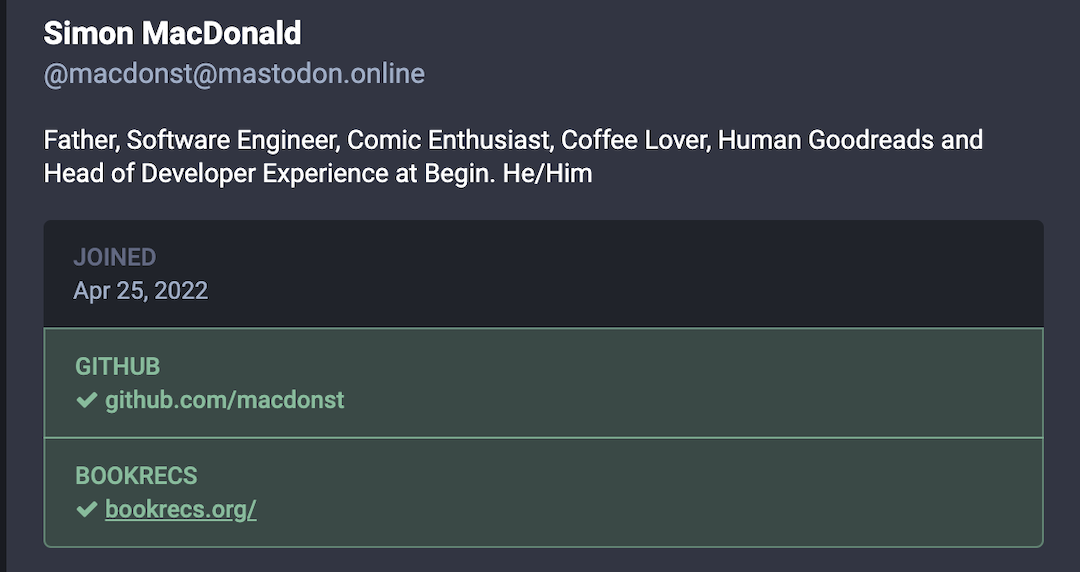
If you put an HTTPS link in your Mastodon profile, Mastodon will check that link to see if it links back to your Mastodon profile with a rel=me attribute. If Mastodon finds a link with a rel=me attribute, you get a verification checkmark next to that link as you are confirmed as the owner.
These rel=me links can come in two formats. A standard anchor tag anywhere on your page:
<a href="https://social.example.com/@username" rel="me">Follow me on Mastodon!</a>In the blog template a good place to add this link is on line 2 of app/elements/site-footer.mjs.
export default function SiteFooter ({ html }) {
  const me = null // Ex. 'https://social.example.com/@username'
  return html`
    <footer class='pt4 pt6-lg pb4 pb6-lg'>
      ${me && `<p class='text-center pb-4'>
        <a rel='me' href='${me}' class='font-body text-1 uppercase tracking3 underline'>Mastodon</a>
      </p>`}
      <p class='text-center'>
        <a href='/rss' class='font-body text-1 uppercase tracking3 underline'>RSS</a>
      </p>
    </footer>
  `
}
Which will add a link back to your Mastodon account at the bottom of each page on your blog.
If you don’t want to add a visible link to your Mastodon account, you can a link tag embedded in the head of your web page.
<link href="https://social.example.com/@username" rel="me">Once again, in the blog template, you can add this link on line 5 of app/head.mjs.
import { getLinkTag } from '@enhance/arc-plugin-styles/get-styles'

export default function Head() {
  const siteUrl = process.env.SITE_URL || 'http://localhost:3333'
  const me = null // Ex. 'https://social.example.com/@username'
  return`
    <!DOCTYPE html>
    <html lang='en'>
      <head>
        <title>Enhance Blog Template</title>
        <meta name="viewport" content="width=device-width, initial-scale=1">
        ${getLinkTag()}
        <link rel='stylesheet' href='/_public/css/global.css' />
        <link rel='stylesheet' href='/_public/css/a11y-dark.min.css' />
        <link rel="webmention" href="${siteUrl}/webmention">
        ${me && `<link href="${me}" rel="me">`}
      </head>
  `
}
Once you do, all your blog pages will include a link back to your Mastodon account.
Triggering validation
Once you’ve made one of the above changes, re-deploy your app so the changes take effect. Then save your Mastodon profile. The verification process is triggered when you save your profile.
Note: it may take some time before the verification process completes.
If you have added the rel=me link and verification is not working, then try deleting the link, saving, re-adding the link, and saving again.
That’s all it takes to validate your Mastodon account with your Enhance website. Consider grabbing a custom domain for your site for greater personalization.
Further Reading
- Read the release announcement for our blog template
- Learn how to style the blog template
- Grab a domain name
- Get set up with webmentions
- Syndicate your blog with POSSE
- Introducing Themes for the Enhance Blog Template
Next Steps
- Join the Enhance Discord to share your blog, request theming features, or to ask for help from our team and the community